It is sometimes necessary to issue a wildcard certificate from your internal Microsoft CA, I had such a requirement this week and thought it would make a nice blog post.
The post assumes you have a Enterprise CA already deployed and a web server template deployed and available for enrolment.
First we need to create the certificate request that will be issued to your CA.
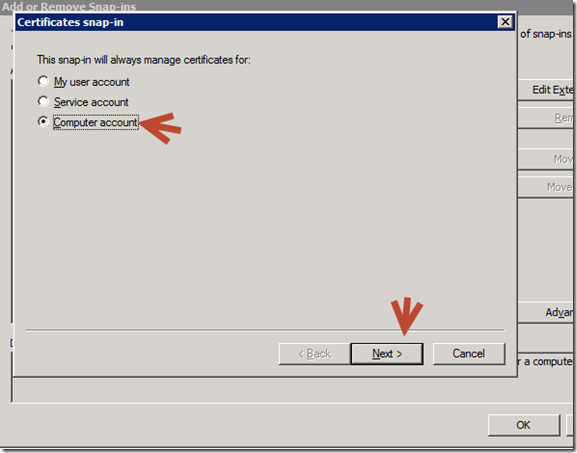
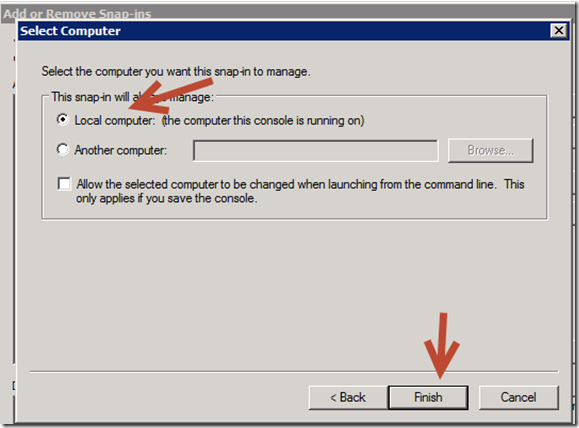
1. Logon to a Windows 2008 R2 or Windows 7 domain member2. Open the certificates MMC snap-in
Now create the certificate request3. Right click the Certificates folder which is found under the personal folder4. Select All Tasks > Advanced Options > Create Custom Request
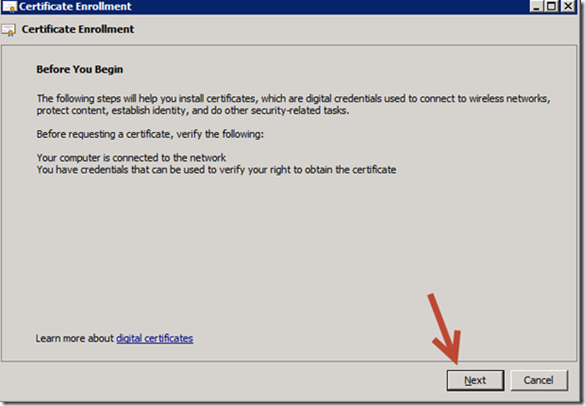
5. In the Certificate Enrolment Wizard Click Next
6. In the Certificate Enrollment Page select Custom Request > Proceed without enrolment Policy and then select Next
7. In the Custom Request Page select (No template) Legacy Key from the drop down and then select Next
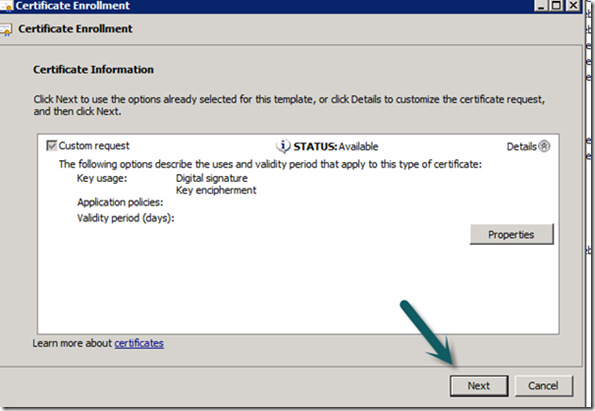
8.On the Certificate Information Page select the Details link, then select the Properties button
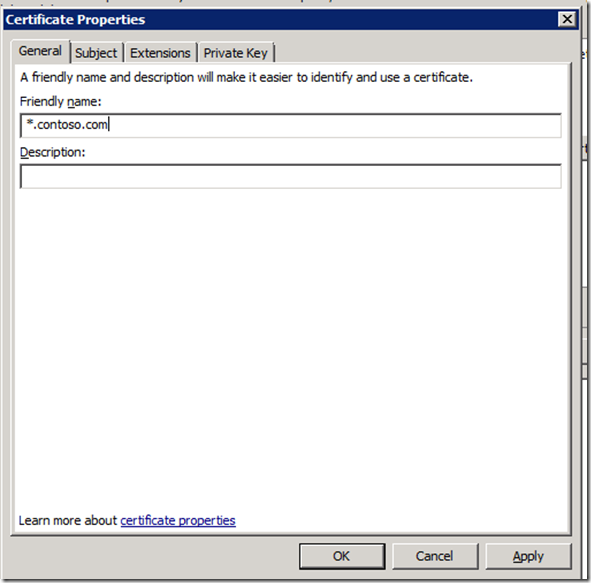
9. On the General tab complete the Friendly name field and optionally you can add a description for the certificate.
10. Select the Subject tab and fill in the relevant information as described below
Field
|
Value
|
Description
|
Common Name
|
*.contoso.com
|
The name of the certificate. This field is used to identify the certificate. Adding the * before the domain name indicates a wildcard certificate for that domain.
|
Organizational Unit
|
IT
|
The name of the OU. In most cases this is the IT department
|
Organization
|
Contoso Corp
|
The name of the Organization where the certificate is for.
|
Location
|
Seattle
|
The location of the registered location of the organization.
|
State
|
WA
|
The County/State of your organization
|
Country
|
US
|
The country of your organization
|
11. Select the Extensions tab12. In Key usage select Digital and Key encipherment
13. On the Private Key tab set the key size to 4096 and select the option Make private key exportable.
14. Under Key type select Exchange15. Select OK
15. On the certificate Information page select Next
16. Save the request file
That’s the certificate request file done, which was nice and easy even though there was a number of steps, we next need to use this request to generate the rest of the certificate on the CA.
17. Browse to your internal CA web enrollment pages18. Select Request a certificate
19. Select advanced certificate request
20. Select the Submit a certificate request link
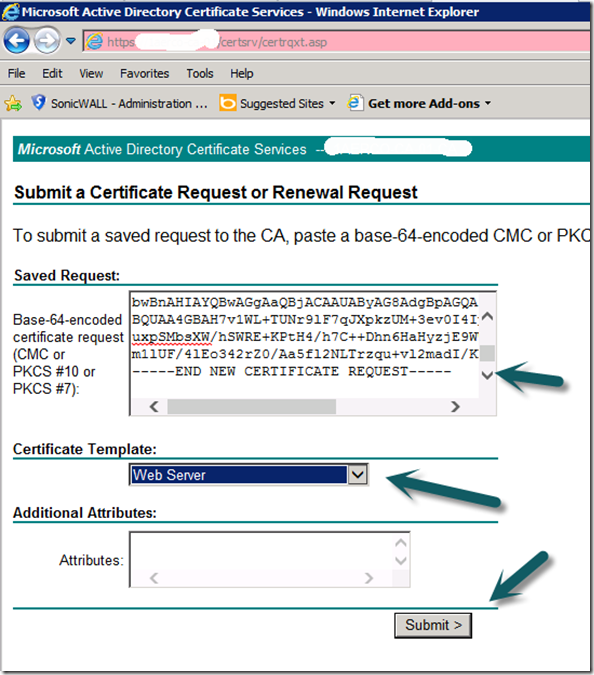
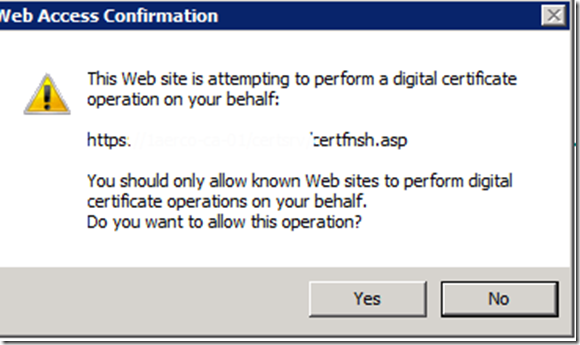
21.Open the previously created request file in notepad and copy all the data in it to clipboard.22. Past the clipboard into the Saved Request box23. Select the web server template24. Click submit25. You might get a popup box asking for confirmation, select yes
When the CA done it’s job it will offer you the ability to download the certificate26. Select Base 64 and select Download certificate
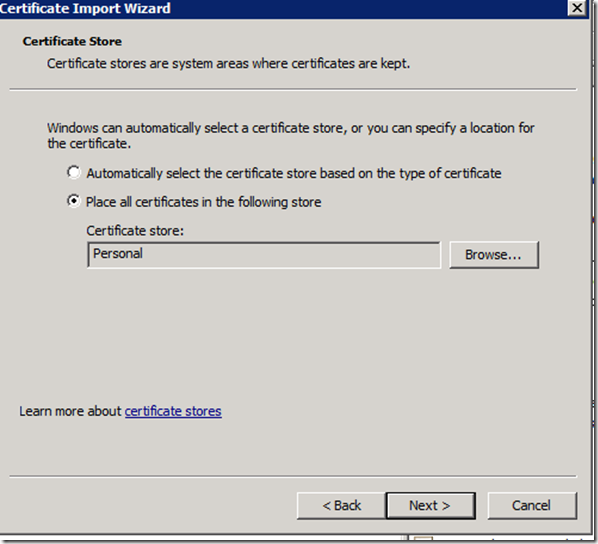
Now back in the local machines Certificate snap-in27. Right click the Certificates folder in the personal folder store and select import and import the file you downloaded from the CA
Now check in the certificate store you should be a valid certificate with a private key














Комментариев нет:
Отправить комментарий